Setting up VPN connection
Prerequisites
Active subscription within Smart Mission Lab system
OpenVPN installed on your computer
Getting OpenVPN configuration file
Customers can download OpenVPN configuration from Smart Mission Lab website.
Go to Subscriptions page of your account on Smart Mission Lab website (https://sml.kplabs.space/subscriptions).
Click link and save downloaded file.

Note
If link isn’t active, your subscription is still in preparation. Wait for a while and try again later.
Connecting to VPN
Exact steps needed to connect to VPN depends on operating system and OpenVPN client used. Follow steps in section matching your setup.
Note
SML supports only one connection per-customer at the same time.
Windows with OpenVPN GUI
Using context menu of OpenVPN GUI icon in notification area select option.
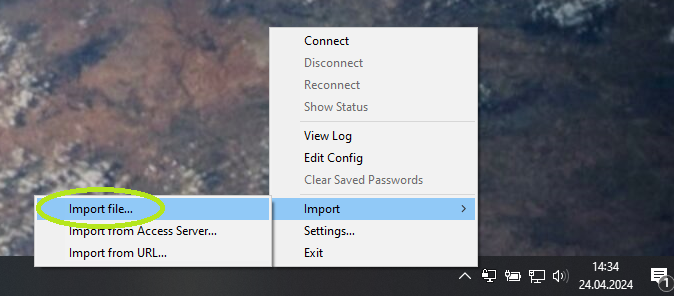
After importing connection file, establish connection using (only one connection configured) or (multiple connections configured) option.

OpenVPN GUI status window will be visible while connecting to SML server and close automatically after success.
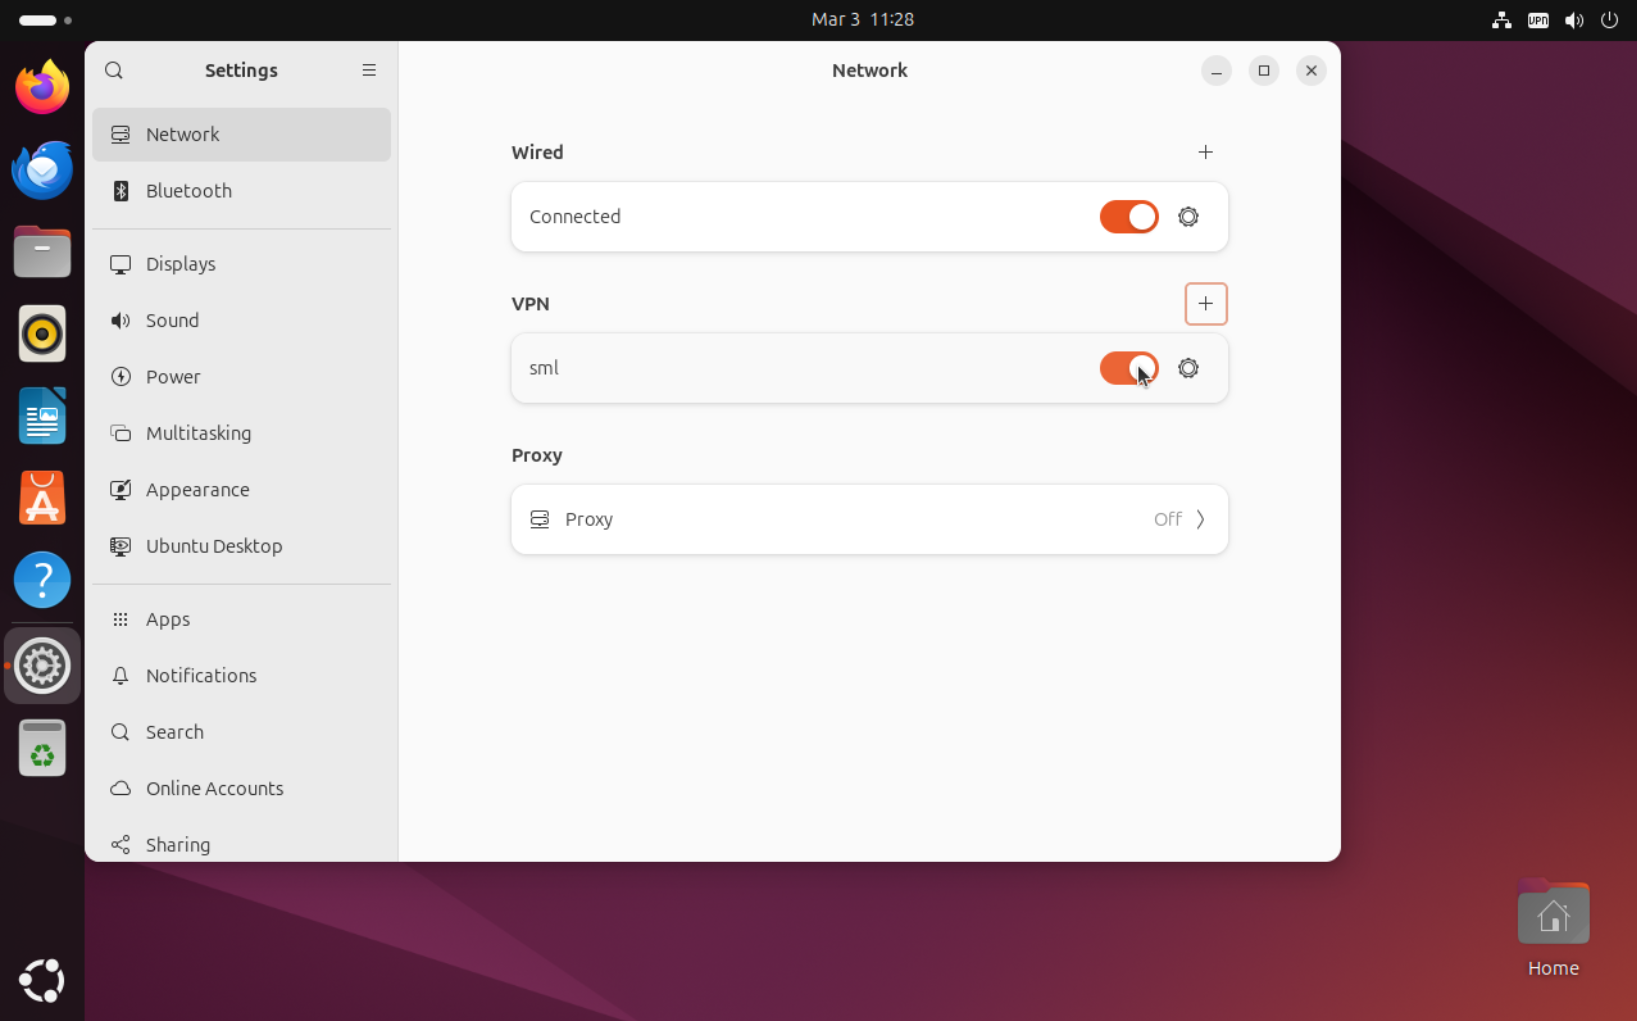
Ubuntu
Follow this steps if you are using Ubuntu or other distribution with similar network management settings.
Open
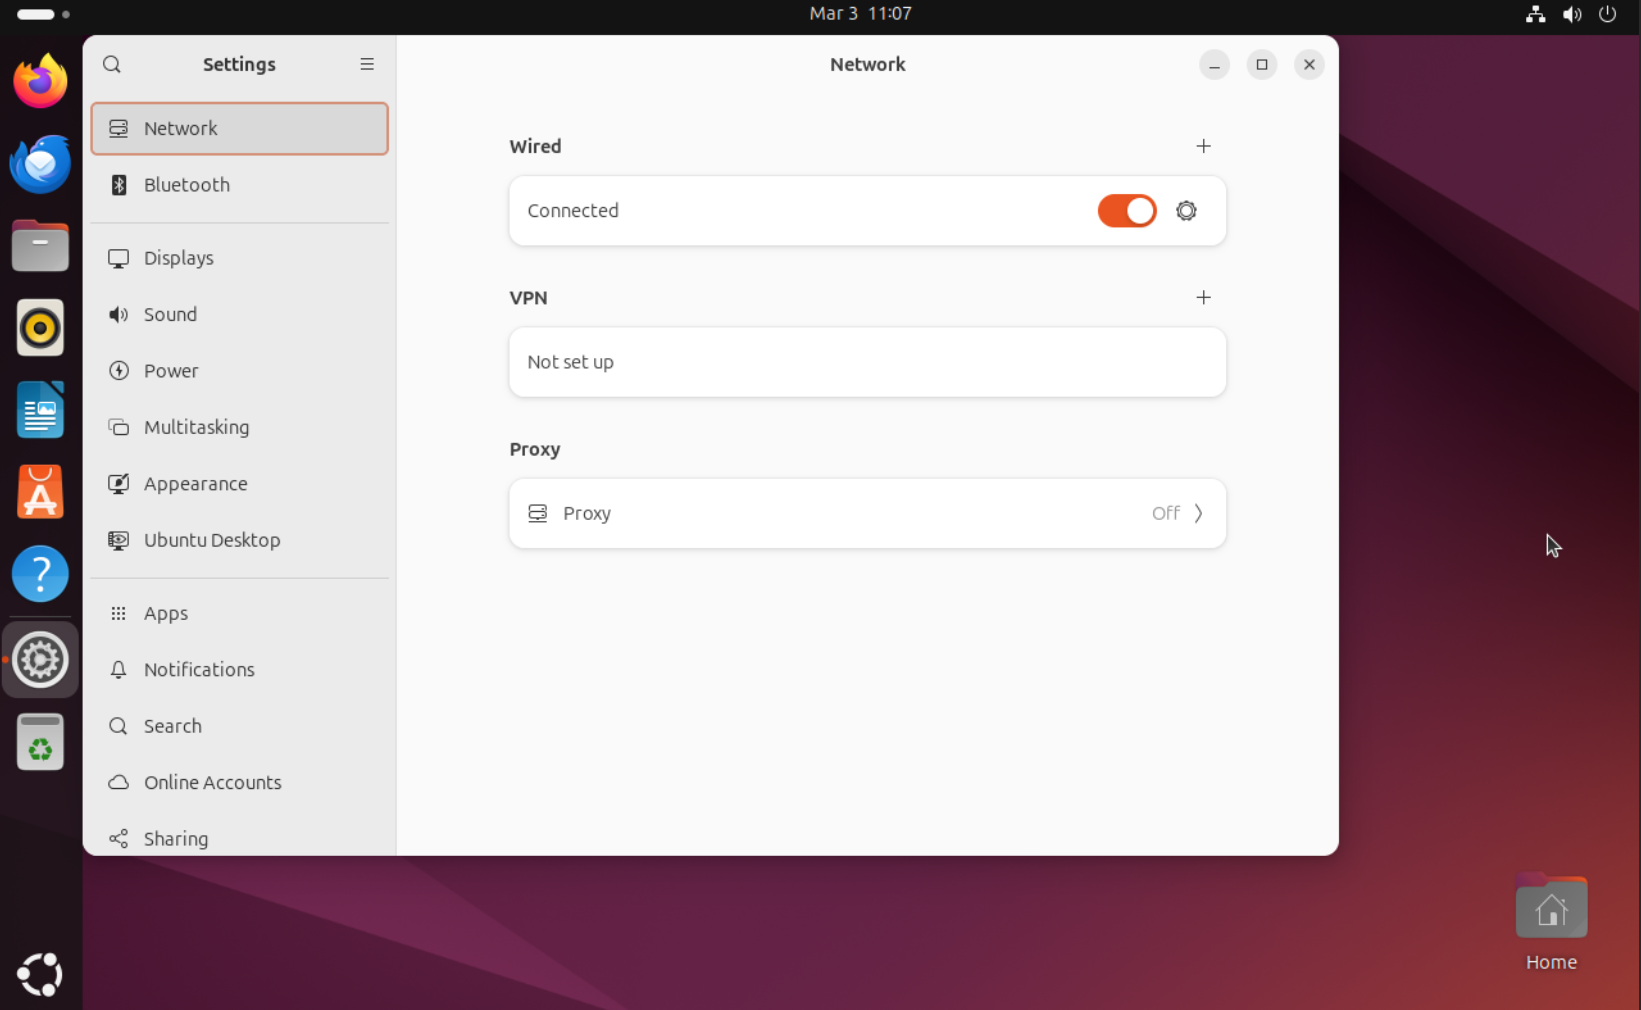
Click sign in section
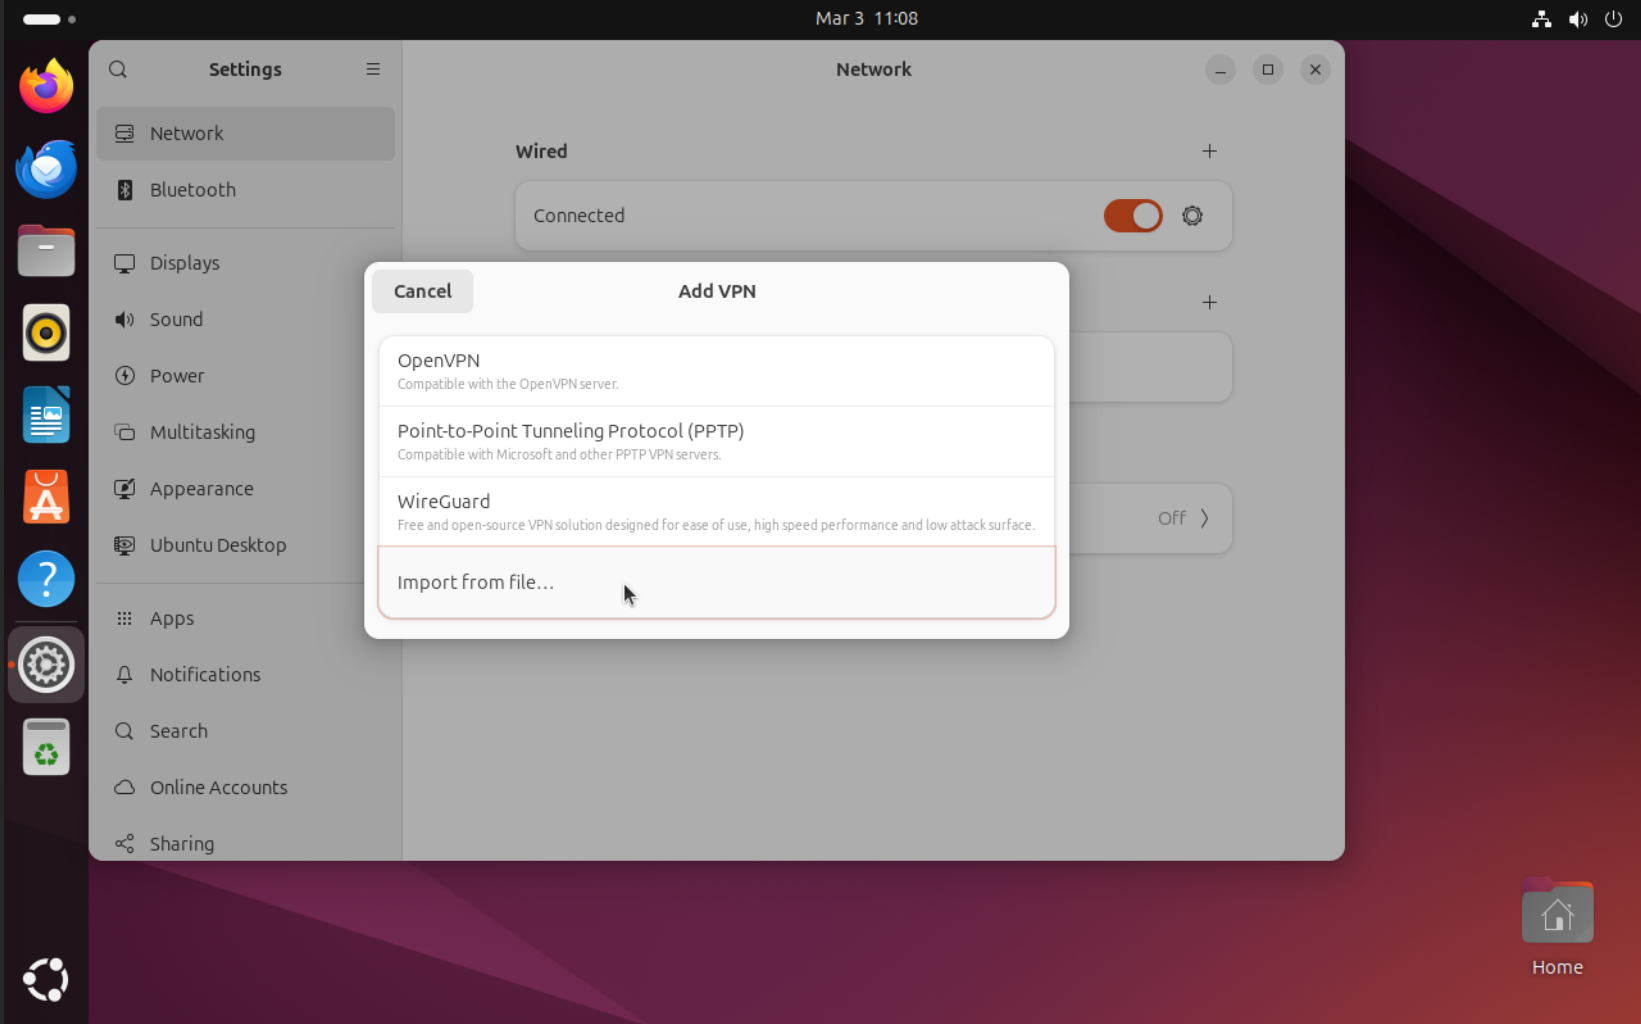
Use option and select VPN connection profile file (downloaded from Smart Mission Lab website).
After importing file, connection settings file window will appear. Go to tab and make sure is checked.
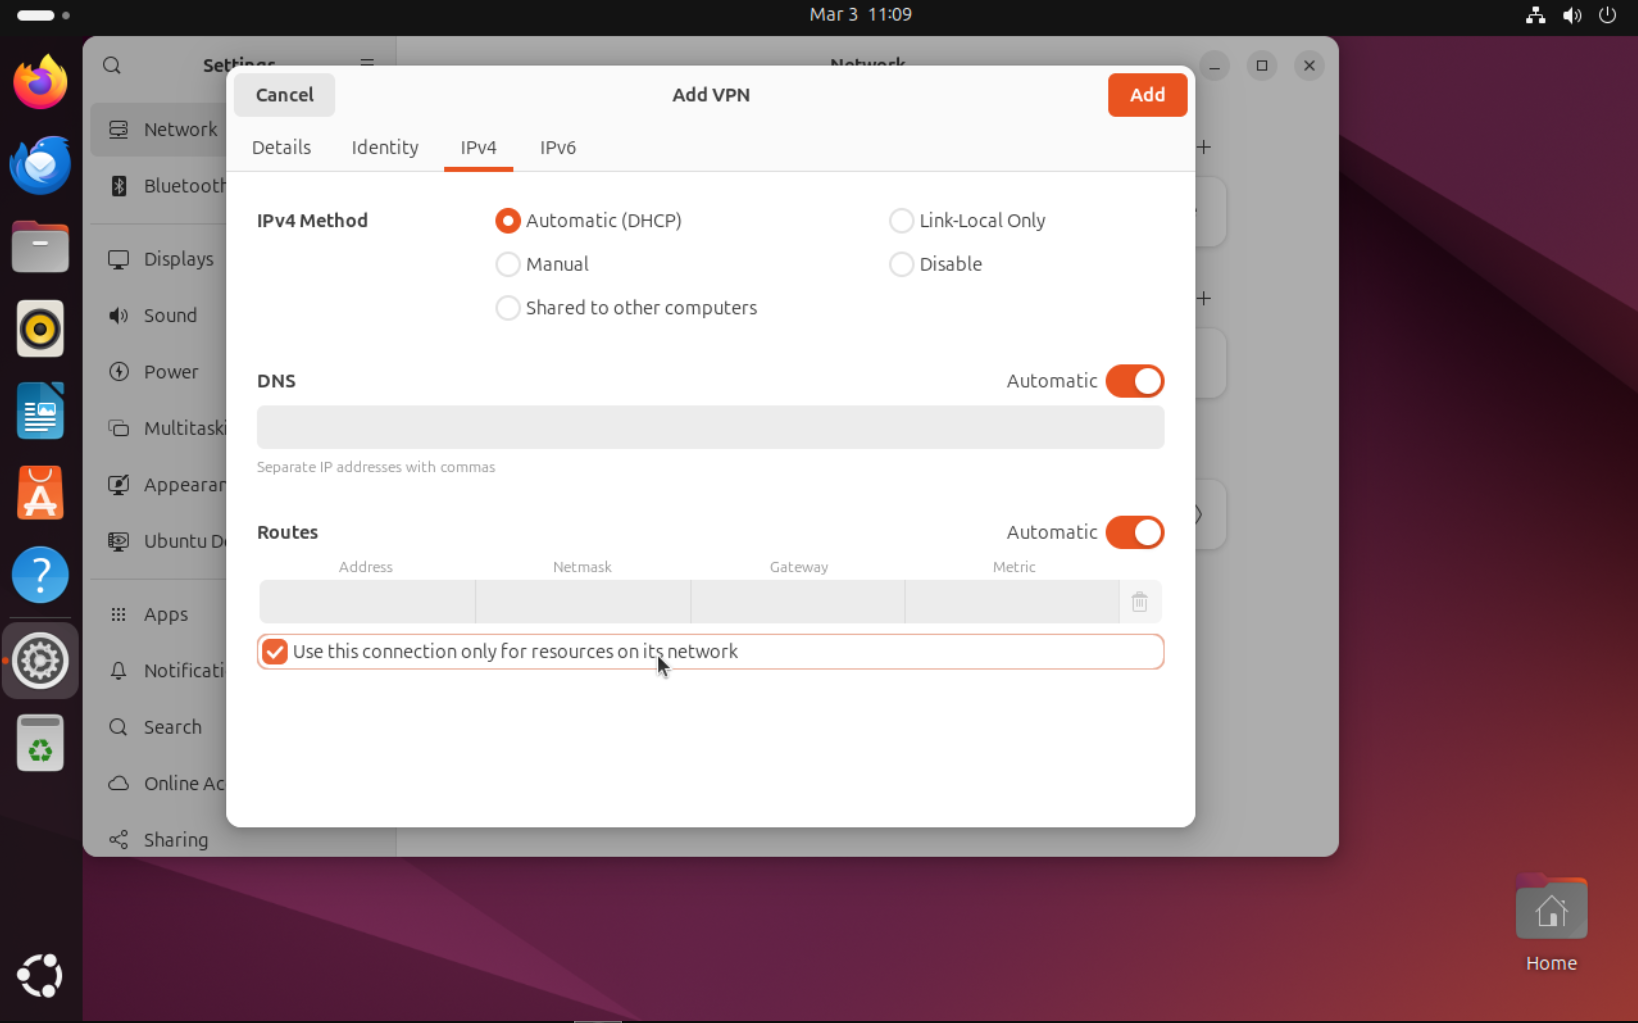
Confirm import by clicking button.
Enable VPN connection using toggle button
Linux with NetworkManager (command line)
Follow this steps if you are using Linux distribution with NetworkManager and don’t want to use desktop environment.
Import VPN connection profile (downloaded from Smart Mission Lab website) as NetworkManager connection
my-machine:~$ nmcli connection import type openvpn file sml.ovpnDisable using VPN connection as default gateway
my-machine:~$ nmcli connection modify sml ipv4.never-default trueNote
This is required due to unfixed issue in NetworkManager: https://gitlab.gnome.org/GNOME/NetworkManager-openvpn/-/issues/48
Activate VPN connection
my-machine:~$ nmcli connection up sml
Connection successfully activated (D-Bus active path: /org/freedesktop/NetworkManager/ActiveConnection/3)
Verify that connection is active and DNS settings are in-place
my-machine:~$ nmcli
...
tun0: connected (externally) to tun0
  "tun0"
  tun, sw, mtu 1500
  inet4 10.100.0.17/32
  route4 10.100.0.18/32 metric 50
  route4 10.80.4.40/29 via 10.100.0.18 metric 50
  route4 10.80.4.16/29 via 10.100.0.18 metric 50
  route4 10.80.4.56/29 via 10.100.0.18 metric 50
  route4 10.80.16.128/27 via 10.100.0.18 metric 50
  route4 default via 10.100.0.18 metric 50
  inet6 fe80::6c70:f243:eda3:7dc3/64
  route6 fe80::/64 metric 256

DNS configuration:
  servers: 10.80.4.42
  domains: vpn.sml.kplabs.space
  interface: tun0
  type: vpn

  servers: 10.72.0.1
  interface: ens18
Highlighted lines indicate NetworkManager correctly configured DNS settings.
Linux with systemd-resolved
Follow this steps if you are using Linux distribution with systemd-resolved
Install https://github.com/jonathanio/update-systemd-resolved using your distribution’s package manager
my-machine:~$ sudo apt install openvpn-systemd-resolvedNote
Exact package name and installation method might differ for your distribution. This tutorial uses names and paths from Debian 12.
Modify OpenVPN connection profile (downloaded from Smart Mission Lab website) by adding following lines at the end of file:
...

<tls-auth>
...
</tls-auth>

script-security 2
up /etc/openvpn/update-systemd-resolved
up-restart
down /etc/openvpn/update-systemd-resolved
down-pre
Note
Verify that
/etc/openvpn/update-systemd-resolvedpoints to existing file fromupdate-systemd-resolved. Different distributions might place it in different place.Connect to Smart Mission Lab VPN
my-machine:~$ sudo openvpn <path to customer>.ovpn
...
2025-03-03 09:51:40 net_addr_ptp_v4_add: 10.100.0.17 peer 10.100.0.18 dev tun0
2025-03-03 09:51:40 /etc/openvpn/update-systemd-resolved tun0 1500 0 10.100.0.17 10.100.0.18 init
<14>Mar  3 09:51:40 update-systemd-resolved: Link 'tun0' coming up
<14>Mar  3 09:51:40 update-systemd-resolved: Adding IPv4 DNS Server 10.80.4.42
<14>Mar  3 09:51:40 update-systemd-resolved: Adding IPv4 DNS Server 10.80.4.42
<14>Mar  3 09:51:40 update-systemd-resolved: Adding DNS Search Domain vpn.sml.kplabs.space
<14>Mar  3 09:51:40 update-systemd-resolved: SetLinkDNS(4 2 2 4 10 80 4 42 2 4 10 80 4 42)
<14>Mar  3 09:51:40 update-systemd-resolved: SetLinkDomains(4 1 vpn.sml.kplabs.space false)
2025-03-03 09:51:40 net_route_v4_add: 10.80.4.40/29 via 10.100.0.18 dev [NULL] table 0 metric -1
2025-03-03 09:51:40 net_route_v4_add: 10.80.4.16/29 via 10.100.0.18 dev [NULL] table 0 metric -1
2025-03-03 09:51:40 net_route_v4_add: 10.80.4.56/29 via 10.100.0.18 dev [NULL] table 0 metric -1
2025-03-03 09:51:40 net_route_v4_add: 10.80.16.128/27 via 10.100.0.18 dev [NULL] table 0 metric -1
2025-03-03 09:51:40 Initialization Sequence Completed
```
Highlighted lines indicate that systemd-resolved configuration now uses Smart Mission Lab DNS server.